 |
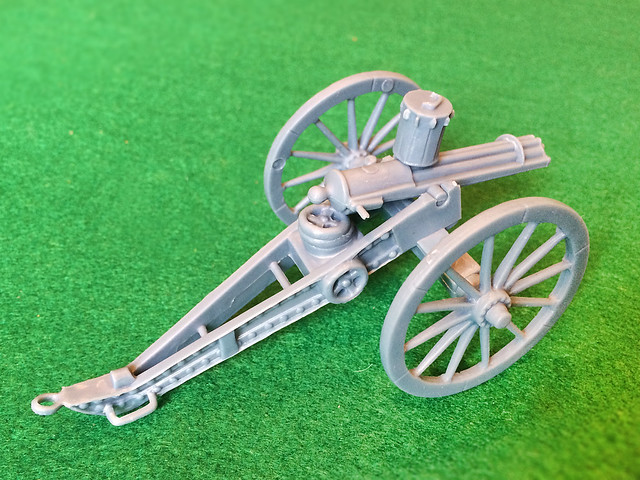
| AiP's Gatling Gun. Unfortunately I can't identify exactly which version of the historic Gatling Gun this is supposed to be. |
In the end I decided that the best way to deal with both these issues (and ensure I can make use of the optional artillery barrels) is to build my own custom gun carriage from scratch - using the AiP carriage as a guide. Not a hard job as the carriage is a pretty simple in design...

I was a bit dubious about how AiP had chosen to mount the Gatling Gun, as the way they have done it is to 'pin' it into place using conventional cannon-style trunnions. This means there is no lateral movement of the gun unless you move the whole carriage left and right. I had thought that the Gatling was mounted on some sort of simple swivel mounting?
 |
| A 1 inch 1865 Gatling mounted using trunnions on a field carriage. This form of mounting seems to have been an early type of mount, with fully articulated swivel mounts coming later perhaps. This is the format of AiP's model. |
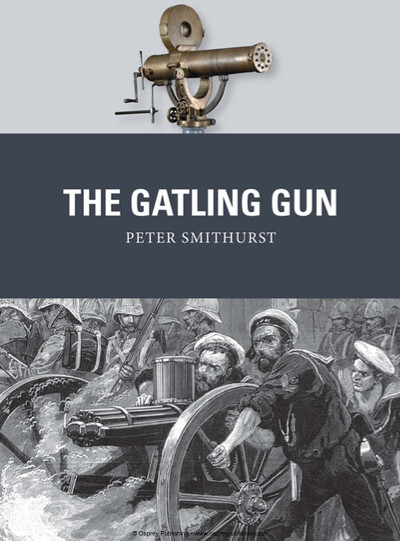
"The Gatling guns which accompany the expedition are those known as the 0.45 inch. They will be mounted on carriages somewhat similar to the guns [i.e. artillery], and, we presume, are mainly intended for the defence of stockade positions."
~ The Times of 6 October 1873
[Osprey 'The Gatling Gun', Page 50.]
My reading leads me to believe that these Gatlings were probably similar to Model 1865 guns in 1in calibre (as in the illustration above). The fact that this type of mount existed is good enough for me as it happens to be easier to recreate.
Just bear in mind that if you do want to model later Gatling Guns that their carriages did evolve to include better transverse rail or swivel mounts which provided easier lateral movement. These include British Army Gatlings that were deployed in the later Boer War...
Anyhoo...Onto construction...
Making a feasible circa. 1870 Gatling Gun carriage
All the barrels included in the set (see earlier post) are so delightfully appropriate for my Molatarian artillery company that it would be a great shame to simply consign three of them to my scraps box and just make up the Gatling Gun using the one carriage that AiP includes in the set.
The solution to this problem was simple...Make three more gun carriages, starting with one for my Gatling!
One must remind oneself that this is a 'toy gun' carriage and so the liberties taken are excusable, certainly from the point of view of the Funny Little Wars enthusiast. But even so I wanted to modify the Gatling version of the carriage to something I felt was more appropriate.
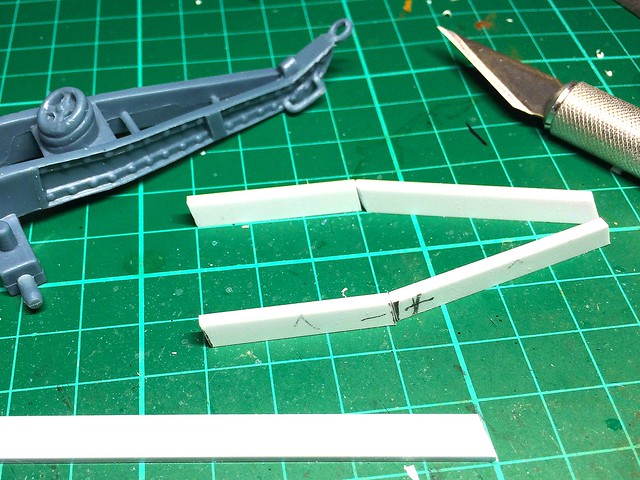 |
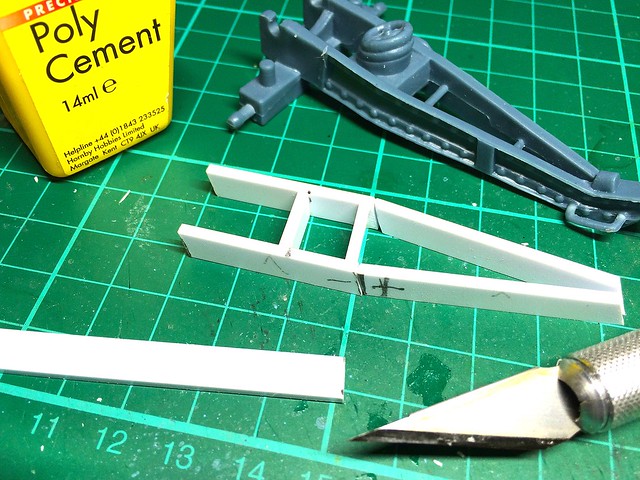
| And so it begins. I didn't buy any special materials but used just what happened to be on hand in my styrene collection and of the nearest dimensions. Though it'll be a slightly lighter carriage, which is good. |
It's a simple 'box' frame design so poses no tricky modelling issues. My main concern was getting some form of reference material on which to base my model, this opened up a whole 'research' can of worms. The AiP carriage, as I said, is a generic artillery carriage rather than one of the more specialised Gatling carriages that were developed - which provided movement in the horizontal as well as vertical firing plane - which is more appropriate to the earlier models of Gatling Guns.
Anyway, historical worries aside, I simply wanted some ideas about how I would furnish and ornament my carriage frame. I particularly wanted to replace the 'lump' which is supposed to be the elevation wheel on the AiP original. The AiP carriage also looks like it is a metal riveted affair and I wanted to see if there were indeed such metal carriages in use with the Gatling (as it turned out there were).
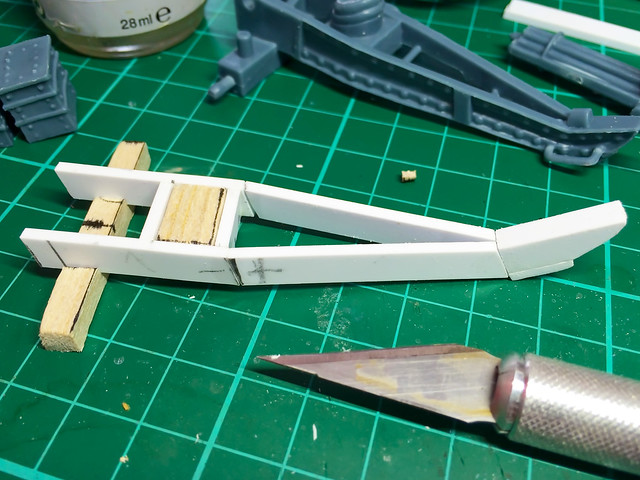
As is obvious from the pictures I have taken of the construction process I am working in light-weight materials - styrene and balsa wood. While these will not make the sturdiest of models they are nearly as good as the original AiP plastic and are, naturally, very easy to work with. Actually I haven't worked much with Balsa before and I am finding it a very nice medium (if you aren't too concerned about the hardiness of the model.)
I suppose the ideal way to ensure a fairly strong toy - for playing with - would be to cast my model in resin when I have finished making it. This would make it more resilient and durable. I'll think about that (it depends how good a job I make of it and whether I feel this carriage may be just a 'one off' or not).

So, onto fitting the AiP Gatling Gun model to my carriage. The trunnion arrangement - the metal pivots which are used to attach the gun to the carriage - are those parts which mark this gun out as being an earlier version of the gun. What this means is that, while the gun could be elevated freely, moving the gun from side to side - an basic requirement of a machine-gun - was only achievable by rotating the whole gun carriage (like a cannon).
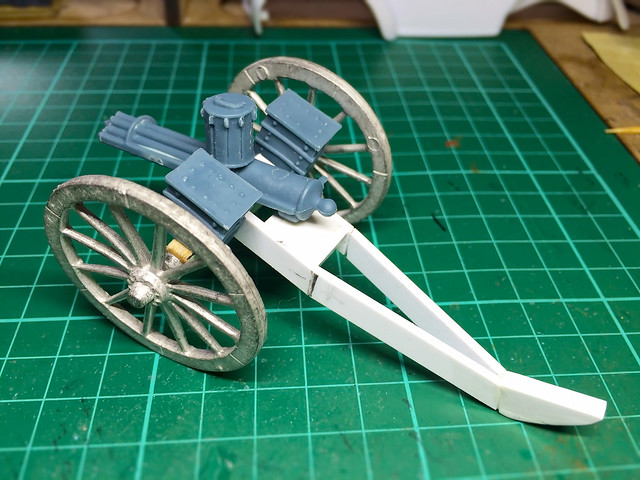
Well, I completed the basic carriage frame construction, but there is a lot of detailing work left to do. Still, it looks OK and I found a spare set of white-metal wheels that finish off the compliment of parts, the AiP original items being those moulded in the blue-grey plastic.
Now I have to plan how to add all the carriage furniture and detailed accessories - like the elevation screw - and clean up the AiP gun itself (which has a little flash and some seam lines). But, not a bad start.
Next: Adding all the fancy details to finish off the model.
No comments:
Post a Comment