 |
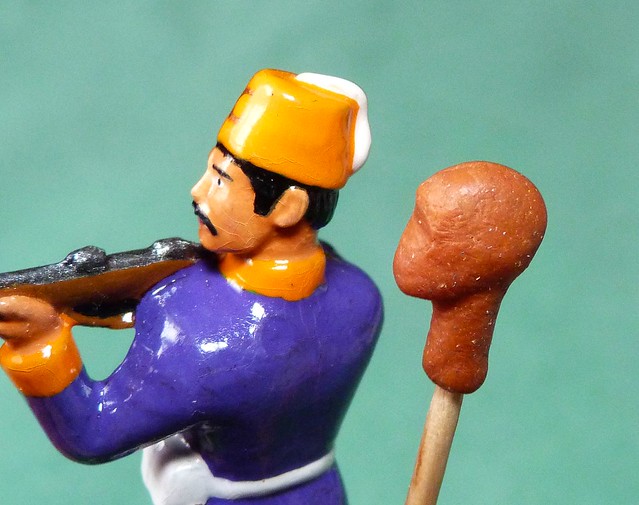
| My Mk I head and the new Mk II 'skull'. The new head is slightly smaller for compatibility with my AiP soldiers. |
With regards to scale I repeatedly compared the size of my Mk II 'skull' with one of my Armies in Plastic soldiers...
 |
| While using the AiP head as inspiration, my head will be of my own design and will have differing features. |
Again, I used the red-brown Milliput putty and I let this head dry before I start the next phase. I will now start to plan out the features on my head, nose, brow, mouth and ears - I will probably draw them on first before starting to add the putty.
The goal is a generic head, with basic features but no hair. I will add this to the duplicated resin versions to make variations in the look of the head. The other thing that I will do when I get the resin versions is to cut the top of the head off to add the various types of hats that I want.
Once the hats are added to my head I will again send them back to my brother who will cast the final version. And there you go - an original head of my own design.
One issue is that the scale of heads differs from one manufacturer of toy soldiers to another - I would have to design different heads, of different style and size, for each type of soldier I wanted to convert or personalise. Still, progress.
Next: Facial features.
No comments:
Post a Comment